Category:
Cast-Ons
Video: Chinese Waitress Cast-On
Characteristics: has matching bind-off, recommended, reversible, stretchy
Difficulty: Intermediate

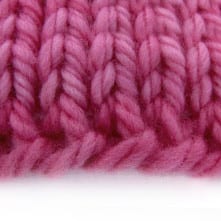
The Chinese Waitress Cast-On is a beautiful, reversible, and stretchy short-tail cast-on.
It was taught to knitting author Cap Sease's friend by a waitress in a Beijing restaurant, hence the great name.
Not only is this cast-on very stretchy, it also doesn't curl on stockinette, and it creates a reversible double-chain effect along the bottom edge that is very pretty.
I recommend this cast-on for Garter stitch as well.
For an in-depth guide to this great cast-on, including shortcuts, crochet and continental versions, and matching bind-off, see the {REAL} Chinese Waitress Cast-On Masterclass.
Recommended Materials: Optional: Crochet hook
Instructions
- Place a slipknot on the left-hand needle. Leave a short tail (6"). The slipknot does not count as a cast-on stitch and will be removed later.
- Cross the right-hand needle behind the left-hand needle, to the right of the slipknot.
- Tension the yarn in your right hand.
- Bring the yarn up and over the left-hand needle, then around the back of the right-hand needle in a figure-8 motion.
- Pull the stitch on the right-hand needle through the two loops on the left-hand needle.
**SHORTCUT:**
6. Twist the right needle down and to the left, away from you, and then bring it back up to cross under the left needle.
**REGULAR VERSION (NON SHORTCUT)**
6. Remove the right-hand needle from the stitch.
7. With your fingers, un-twist the stitch towards you so that the right side of the loop is the one coming from the working yarn.
8. Re-insert the right needle into the stitch from front to back, crossing it behind the left-hand needle.
**ALL VERSIONS**
9. Bring the yarn up and over the left-hand needle, then around the back of the right-hand needle in a figure-8 motion (this is the same as step 4).
10. Pull the stitch you just made between the two loops on the left-hand needle and, in the same movement, through the stitch already on the right-hand needle.
11. Repeat steps 6-10 until you have cast on one less than the number of stitches required for your project, not counting the slipknot.
12. Slip the stitch that is on the right-hand needle to the left-hand needle. The left needle should go in from front-to-back. This is your last cast-on stitch.
13. You have completed the cast-on. When you knit the first row and come to the slipknot, remove it from the left-hand needle and give the tail yarn a tug. The slipknot will undo.
More Information
For a perfectly matching bind-off, use the Double-Chain Bind-Off.


