Categories:
Bind-Offs, World Travels
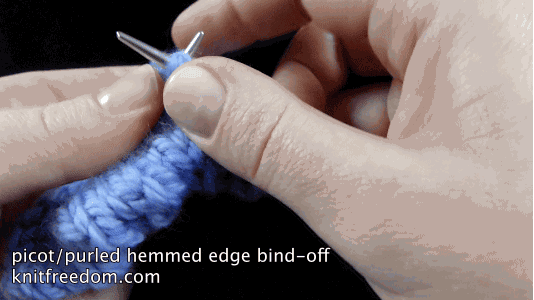
Video: Hemmed Edge Bind-Off – Purl or Picot
Member Video
![]()
![]() This video is available to customers of the following class(es):
This video is available to customers of the following class(es):
Purchase the class above to get instant access
OR
Become a KnitFreedom Member
and get this and over 450 premium knitting videos for just $12.99/month.
If you own this class or are a KnitFreedom member, please LOG IN to watch.
Characteristics: great for toe-up socks, recommended, stretchy
Difficulty: Advanced

This is an advanced bind-off that I adapted myself by taking the Picot/Purled Hemmed Edge Cast-On and turning it into a bind-off.
To do it, fold your work at a line of purl bumps or simple lace and bind off the edge to the inside of your knitting.
This makes a perfectly flat, hemmed edge that can be fancy or neutral, depending on which variation you choose.
Instructions
To set up this bind-off:
- Work 6 rows in St st.
- Put a marker into one of the sts in the 1st row when you do it so it’s easy to count your rows later.
- Next row (RS):
- For the picot edge: (K2tog, yo) across.
- For the purled edge: P across.
- Work next 5 rows in St st. turn.
To work this bind-off:
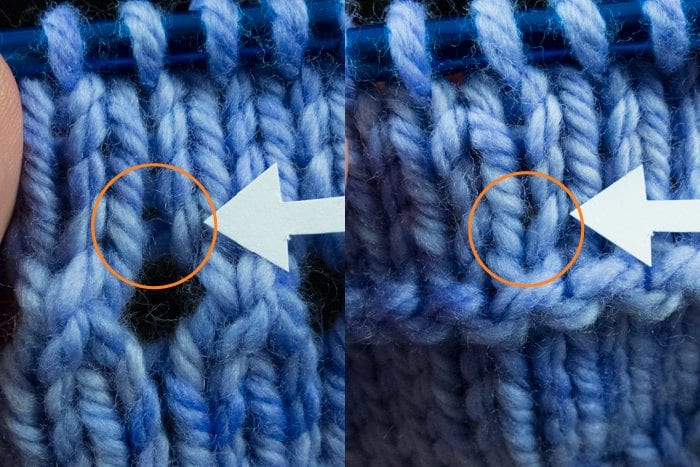
- Count how many rows you’ve done after your picot or purl row. The circled stitch is row #1.
- Fold your work at the picot/purl row.
- Find the purl bump directly below the stitch on your needle, right where your needle falls when the fabric folds evenly. Grab it with your R needle tip.
- Place the loop on your L needle.
- K2tog. This is what I call “hemming” 1 stitch.
- Hem next st.
- K 2 sts on R needle together.
- Repeat steps 6-7 across.
Tips
The trickiest part of this bind-off is finding the right purl bump on the WS to slip onto your needle to hem the edge. Just look at the picture below and watch the video and I’ll show you exactly how to know that you’re getting the right purl bump.

If you’re not getting the right purl bump, the edge will bias a little bit and it won’t lay perfectly flat — you’ll know you got it wrong and you can undo it and try again.
When the work lays perfectly flat after it’s been folded and tacked down you’ll know that you’re picking the exact right purl bumps to go into.
Tip #2: Make sure that you knit plenty of rows before and after the picot/purl row before binding off, because if you skimp, the edge is going to flare out instead of laying flat, and it will look weird. Nobody wants that.
I recommend knitting 11 rows before and 10 rows after you do the picot/purl row before folding your work and binding off. I’ve given you the minimum (6 and 5 rows) in the instructions above.
Hemmed Edge Bind-Off - Step-by-Step Photo Instructions
Restricted Content
This content is available to customers of the following class: I Love Bind-Offs
Click here to learn more about I Love Bind-Offs OR
Join our KnitFreedom Premium now and get this and every other content we sell FREE.
If you own this class or are a member of KnitFreedom Premium, please LOG IN to view.
Animated GIF: Hemmed Edge Bind-Off – Purl or Picot
If GIF doesn't play immediately when clicked, wait 20-30 seconds. It will play. Click the GIF again to stop.
More Information
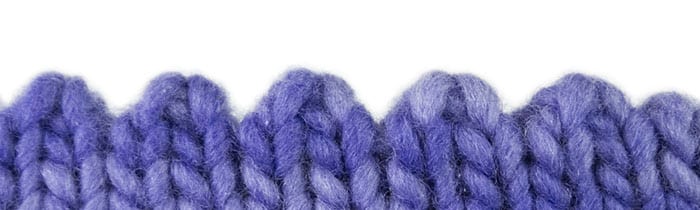

This is a perfect bind-off for toe-up socks where you don't want to do ribbing, because it’s stretchy and sturdy and the edge doesn’t roll.
I really recommend that you try this technique. It’s a beautiful bind-off and you’re going to be very proud of yourself once you finish it.
